

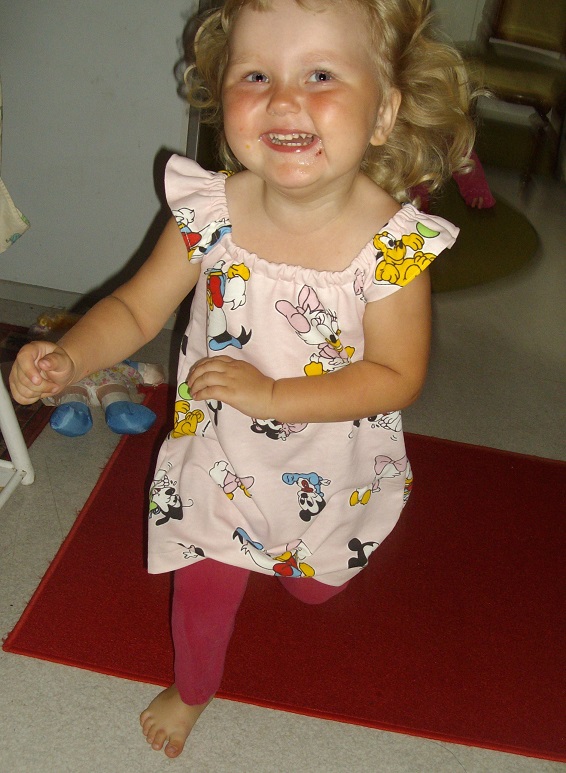
I had an idea to share my pattern for this easy-making dress for a baby or a girl. It's easy to adjust the size by changing the width and the height. By shortening this pattern you can sew a tunic or even a shirt! The width of this patter is probably suitable for a girl aged 1 year to 3 years because it's easy to adjust the size only by lengthening or shortening the elastic band of the neckline. By the way, this pattern is the same one I used in my daughter's dress I sewed last week!
1. LEIKKAAMINEN - CUTTING THE FABRIC
Leikkaa yllä olevalla kaavalla mekon etu- sekä takapuoli: Taita kangas kaksinkerroin ja aseta kaavan katkoviivan kohta kankaan taitteelle. Leikkaa. (HUOM! Kaavassa punaisen nuolen kohdalla leikkaa suoraan alas siten että helman kulmaan muodostuu suorakulma - näin helma on helpompi kääntää lopussa.) Sitten leikkaa vielä toinen mekko-osa. Lisäksi leikkaa 2 hihaa kooltaan 10cm x 30cm.
Use the pattern above and cut the front and the back of the dress: Fold the fabric and place the pattern on it so that the dashed line is on the folded egde. Cut. (NOTICE the place where the red arrow is: In that place, a few cm's before the hemline cut straight down so that there will be a right angle - it's easier to fold the hem in the end.) Then cut another piece similarly. Then cut 2 sleeve pieces sized 10cm x 30cm.
 |
| Hihat 10cm x 30xm - Sleeves 10cm x 30cm |
 |
| Mekon etu- ja takapuoli ovat samanlaiset - The front and the back are similar. |
Huolittele ja käännä ensimmäisenä kädentiet. Sitten vasta ompele kappaleiden sivusaumat yhteen.
Firstly, sew the armhole edges with zigzag and fold the edges! Then seconly, sew the sideseams of the pieces.
 |
| Kädentie ja sivusauna oikealta ja nurjalta puolelta - The right side and the reverse of the armhole and side seam |
Huolittele ja käännä hihakappaleiden alareunat. Voit huolitella myös lyhyet sivut.
Sew with zigzag and then fold the lower edge of each sleeve piece (see the picture below). You can also sew zigzag to the short edges.

3. HIHOJEN JA KUMINAUHAKUJAN OMPELU - SEWING THE SLEEVES AND THE ELASTIC BAND
Aseta hiha kädentielle niin että palat ovat oikeat puolet vastakkain. Kiinnitä ja ompele molempien hihojen molemmat sivut näin.
Place the sleeve on the armohole so that the pieces are right sides towards each other. Attach with pins and sew. Do the same thing to both sleeves' short edges.


Seuraavaksi huolittele "kaula-aukko". Käännä ja neulaa se niin, että ompelun jälkeen mahdut pujottamaan haluamasi paksuisen kuminauhan väylää pitkin. Älä siis ompele koko kierrosta, vaan jätä muutama sentti aukkoa kuminauhan pujottamista varten. Tytöilleni, jotka ovat noin 85- ja 95-senttisiä käytin 55cm pituista kuminauhaa! Kuminauhan pujotuksen ja kiinniompelun jälkeen ompele aukko umpeen.
Next sew the "neckline" with zigzag. Fold and attach it with pins so that after sewing there will be enough space to place the elastic band. Don't sew the whole round but leave a couple of cm's gap for placing the elastic band. My daughters are 85cm and 95 cm tall so for their size I needed an elastic band of 55cm's! Then close the elastic band and the gap too.


4. LOPUKSI KÄÄNNÄ HELMA, TIKKAA SE JA SILITÄ MEKKO! -
FINALLY FOLD THE HEM, STITCH IT AND IRON THE DRESS!
Olisi ihanaa kuulla, jos päädyt käyttämään kaavaa. Olisi myös kiva saada kommentteja ohjeista - onko se helppo vai vaikea ymmärtää? Iloista ompelua!
I would love to hear if you decide to use this pattern. It would also be nice to hear if this tutorial is easy to read or not. Happy moments of sewing!
 |
| Sama mekko käy molemmille tytöilleni. - The same dress fits the both of my daughters. |
 |
| ...vaikka onkin melko pitkä pienemmälle tytölle. - ...but it is quite long for my younger daughter. |


That's really nice, Salla! I love those projects, fast and higly satisying!
VastaaPoistaTx for sharing (PS: your models looks gorgeous, in it!)
MAmmaNene @ SergerPepper
Thanks once again! I'm glad I managed to make a useful tutorial :)This is the first ones I've made so it takes a lot of time to think how many pictures of the sewing project there have to be.
PoistaMoi, olipas kiva, perinteinen malli, johon en vaan jostain syystä ollut koskaan törmännyt aiemmin kun tein omille tytöilleni, 4 kpl, vaatteita. Vasta nyt isoäidin ikäisenä lapsenlapsille ommellessa törmäsin tähän. Helppo ja hauska. Huomenna menen ostamaan jotain koristenauhaa helmaan. Suurensin mallin ja tein kolme ja viisivuotiaille kivat mekot. Paljon kiitoksia <3
VastaaPoista